Table of Contents
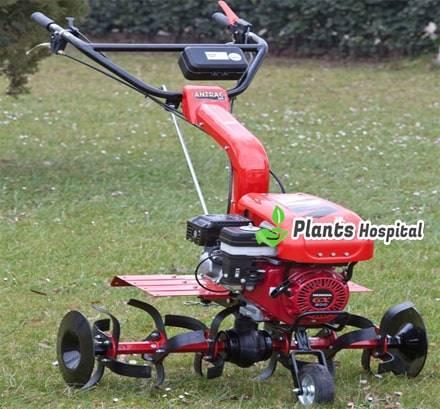
Maintenance and Operation of Anchor Machine
Regular and systematic maintenance after every use of your anchor machine will not take much time and will provide comfort and safety for your next use. Feel free to contact a professional for more complex interventions such as engine, transmission or transmission.
Simple Methods To Increase Life Of Your Anchor Machine
After each use of your anchor machine, regular and systematic maintenance does not take much time and will provide comfort and safety for the next use.
Feel free to contact a professional for more complex interventions such as engine, transmission or transmission.

Cleaning
For better safety, wait for cool of exhaust pipe, then remove the spark plug. If the electric anchor machine is a safety switch, remove the safety key.
Clean work equipment and inner parts of the cover. Wear heavy gloves and use wood or plastic tools. Remove all gaps and wash them with water if necessary.
Do not use a high-pressure washer. You can make the machine bend backward with handles on the floor to make it easier to access this area.
Do not tilt side to side. First remove the oil bath filter tank, if present. Remove dust from the rest of the machine with a brush.
Editor’s Pick:
Air Filter Maintenance
A dirty air filter can lead to a difficult path, a power failure, a bad operation, and accelerated wear of the engine.
The cleaning of the air filter must always be guaranteed. Check the air filter conditions after each use, clean them when necessary, or at least once every 25 hours. Change filter every 200 hours.
There are various types of air filters according to the engine;
Foam air filter: Remove the element and clean it with gasoline. Dry under the sun. Saturate with engine oil, then press firmly to remove oil evenly and remove excess. Place back in place by the mounting direction.
Double-element air filter: Remove foam filter from the paper filter. Check both components and replace them if they are damaged. To clean paper filter, repeatedly hit a hard surface from the filter to clear dirt or press from compressed air (2 m Max).
Do not use brushes for this process. To clean the foam element: see the previous section. Clean base and the plastic cover of the filter. Replace all items.
Oil Bath Filter: Remove cover, remove foam filter and clean (see the previous section) remove the tank and empty it in a suitable container. Clean tank with liquid detergent and water and then dry. Replace all components and add SAE 10W30 brand motor oil to the filter tank.
The filling level is shown in the tank. Oil discharge should be done once every 25 hours or once a year. The air filter should be cleaned regularly; if the environment is dusty, it should be even more. For more information, see the engine manual or contact your dealer.

Engine Oil
Level Control: It is important to check the motor oil level before each use. To do this, place the machine on a flat surface.
Motor should be horizontal to support. The oil pan is located on the front side of the engine and also a level indicator.
Remove cover, remove it, and wipe indicator. The control is done by placing the lid in place without screwing. On display, read the oil level within the scan area, which should be between low and high levels. The level must always be correct. If not, add SAE 10W30 oil to the 4-stroke engine.
Drain: The first drainage should be done after 10 hours or 1 year, whichever occurs first. So whichever comes first, we recommend every 50 hours or 3 years later.
To do this, you must make an appointment at your dealer or a workshop specializing in tools in the mechanical garden.
Editor’s Pick:
Cable Setup
Depending on the machine model, it contains one or more cables (clutch, reverse gear, engine throttle adjustment.).
They run controls. Control and adjustment are essential for optimal optimization of arm movement. There is a set screw on each cable.
Storage
After work in the fall, you must follow instructions to restart the machine in the best conditions in the following spring.
- Clean machine thoroughly, remove teeth and check. Because an over-worn handle won’t work properly, and when you insert the second message more quickly, replace it if necessary.
- We recommend that you change not only the knife but also all the teeth. A very important gap in the fixing holes of teeth can damage the transmission. Grease spindle and joint before replacing on the machine.
- Check the lower part of the gearbox closing flange. If worn, very important wear should be replaced before damaging the transmission.
- Add 20g lithium-based lubricants to the gearbox. Once every 50 hours or at least once a year before storage.
- Empty fuel tank. Start the engine until the fuel runs out to empty the entire fuel system. You can use a ready-to-use fuel in shops to avoid any problems due to the pollution of the Carburetor with a deteriorated fuel: the fuel contains less harmful products and prevents the carburetor from rubbing.
- Make sure that every nut and screw is thoroughly tightened
- The machine should be stored in a dry and ventilated place.


